Showing posts with label make do and mend. Show all posts

Thursday, 18 September 2014

Saturday Swap Shop

Thanks to numerous events and our habit of living high off the hog whenever we do have money, we are going through a pretty skint patch. All the accounts are near empty except for the ones that are actually overdrawn. It doesn't happen often, but when it does, it tends to be this time of year that we're checking the sides of the couch for loose change. So, time to tighten our belts, pull our horns in, cut our coat according to our cloth and other metaphors.

First job was to declare it Sober September.  I flipping loathe Sober September. At our house there is always wine with dinner (and often wine after as well.) Dinner seems a bit, well, sad without an accompanying glass of wine. However, there's no money for wine so we must do without.  Luckily there's all that lovely seville orange gin I made back in January, so I can have a G&T every now and again without spending money. (75p a bottle of cheap unbranded tonic is within the budget).  Mark - a far more disciplined person who coincidentally doesn't like gin - has had one pint of beer at his mate's birthday bash and otherwise abstained entirely. Most laudable.
Coming in handy
Next up was cutting back the amount we spend on food.

First came changing where I shop. We had some vouchers for Tesco and Waitrose. By choosing carefully from each store and only spending the minimum amount to get the £13 and £15 off I got the staples for less than I'd usually spend. Waitrose is a bit more expensive than the other supermarkets but not £15 more, so it still worked out cheaper.
For perishables, Leeds Market is much better in my experience. I bought great bags of cheap veg and cooked them straight away, freezing all the extra portions. I swapped cod for coley and made fish pies, got ricotta on offer and made cannelloni. I bought frozen broccoli and cauliflower rather than fresh so I could use what I wanted without having some to throw away.  I bought meat from the 'Use by today' section and Mark cooked it straight away in lasagnes to fill the freezer. (Quorn lasagne for me. I don't eat meat.) Some slightly sad looking veg in the cupboard became a great vat of vegetable soup. I love soup.

This is all obvious stuff. Why don't I do it all the time?  I guess because it takes time to think of the cheaper meals, there is more prep work involved and more visits to different shops to get the lowest price.  When you can afford it, it's just so easy to grab a ready meal curry or some take away on a tired and busy night.

However, having filled the freezer with meals I think I can avoid that particular lazy urge. Just bung them in the oven for 45 minutes and dinner is all taken care of - Yay!

Another expenditure is clothes. Over the summer my 2 pairs of cropped jeans and one pair of regular jeans got holes too big to patch. I am short on long sleeve tops and I just can't resist a maxi dress of 5.

I got an email from Monsoon advertising their 20% off day. I love Monsoon dresses. They really suit me.  I popped into the shop when I was in town anyway and tried on clothes with the idea I'd put them on one side for the 20% off day to save money.  This was a mistake. I ended up with three dresses I just loved, and was halfway to convincing myself it would be a great idea to buy them. The nice assistant put them behind the counter for me. Then I went to the cash machine to check on my finances.

Looking at the (lack of) balances, it hit me that 20% off is still 80% on. I might like to kid myself I was spending wisely by doing it on a discount day, but I was still spending.  I told the salesperson not to hold the dresses. I felt VERY glum.

Then lovely helpful Twitter came to the rescue. Someone's list of things to do on the weekend included a clothes swap in the city centre. I never bother with clothes swaps. As a plus size woman (ok, fat) I never find stuff in my size. Charity shops are similarly useless. But this clothes swap was only for size 16 and above. Worth a punt? At the very least I would clear out a few things in the cupboard I never wear.

I was quite nervous about going. I wished I had a mate to go along with me. What if everything was too small? Or it was a club I was gatecrashing? Or I hated everything? Or everyone hated what I brought? Or I was too damned old for the clothes.  But as my Very Excellent Mate Alison pointed out, I'm supposed to be Fearlessly Attempting things. Onwards to the swap...

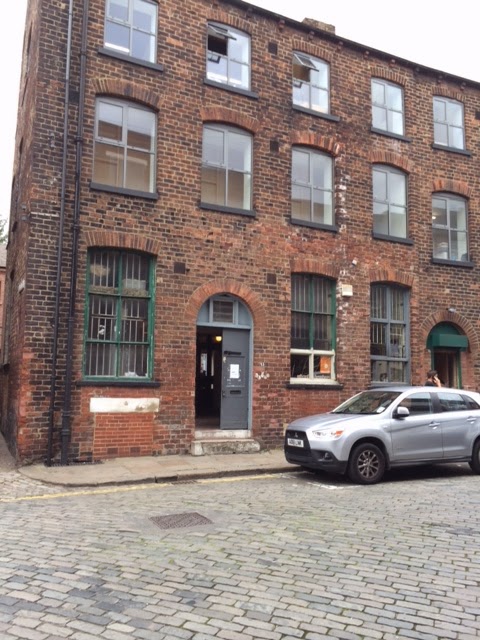
I must admit, it was not the most welcoming building. The door was only half open and the interior looked dark and uninviting.
I went into a small, rather basic looking bar, through a door at the back and into what I assume was originally a cellar or storage room. No windows, exposed brickwork, slightly damp smelling. No mirror (major oversight) nor changing room (we used the disabled loo). I remained nervous.

I was welcomed in by a very friendly pair of women in their 20s, paid my £1 entry fee and told to help myself to anything I wanted on the trestle tables.
Coo.
There was loads of stuff. A table of dresses, two of tops, two of trousers and skirts. The sizes I saw ranged from 16 to 28, and more stuff was arriving all the time as new people came in.  I put out my contributions  and got rummaging.


Within 15 minutes I'd got a pair of cropped jeans that fit perfectly; a pair of bootleg jeans that need a belt or a tuck in the waistband; a casual dress/tunic that needs some repair but felt super comfortable to me; a lovely red linen maxi dress I felt marvellous in.

2 perfect things, 2 things that need very little doing to make them suitable. All for £1 and some clothes that were just taking up space in the far reaches of my cupboard.
ta da!

Take that, Monsoon!

Sunday, 22 December 2013

Just call me Ma Ingalls

Happy Yuletide, my webby co-conspirators!

Only a teeny amount of time left until Christmas Day and I am feeling pretty positive about it. There are loads of things I meant to do but haven't but I'm not fretting. Our kids and the nieces are sorted with their presents and everyone else will just have to cope if I haven't quite sorted everything out. It's the season of peace and goodwill towards over-committed women.

My goal to make most of the presents for friends and relatives has been a mixed success. I've sewn, knitted, crocheted or baked for 3 nieces, my kids, 3 friends, the kids' school, one Secret Santa and my parents. I've also bought a few more than I meant to - partly to save my sanity, partly because I couldn't think of anything to make the recipients that they'd like.

I've spent a total of £9 on supplies for the home made presents. Get a load of my up-cycling self! I've used duvet covers, dresses, tops, fabric left over from previous projects, stuff I bought ages ago and hadn't used and buttons snipped from stained blouses.  I am delighted! And I may be kidding myself but I think my efforts will please the receivers rather than have them pull the strained "erm, thanks" smile.
Of course I would think that, wouldn't I.

For my youngest niece I cleaned up 2 Groovy Girls Miss B had decided to send to the charity shop. They are such lovely rag dolls, I do adore them. I cut up some blouses and summer dressed B had outgrown to make the dolls some new outfits - all with velcro fastenings to make it easy for toddlers to play. I had a bit of fleece left from making a heating pad for the guinea pigs so I whipped up a quick sleeping bag with integral pillow, and trimmed it with more of the dress fabric.

To finish, I sewed a draw string bag with a name label on it. In my experience kids LOVE personalised things.
I love the wonky typewriter stamps I use for names
Using some lovely Egyptian cotton that was a double duvet cover in its previous life, I made night dresses for my daughter and her cousin who is the same age. I trimmed the nighties and their overnight bags  with the pink rosebud material I made B's Laura Ingalls costume from, and appliqued each girl's initial on her nightdress and bag. I popped a small stuffed toy in that I'd picked up for 99p in a sale over the summer and ta da - a sleepover bag.

For my older niece I got her something to go with the book she fancied. She's very into wildlife and (thankfully) extremely non-girly so I made a tablet cover that looked like an owl for her. She got her initial on the back too. Having seen it, my son has decided he would like one too, so I need to get that done when I've finished the PJs and so on.

It took about an hour (mostly getting the size right as I'm mis-measured the first time) and I think it's pretty cool.

The other things I've made are for people who could conceivable read this blog, so I'll keep quiet until they're received them. 

I did not have a pattern for anything but the night dresses  - and even that I had to change quite a bit to make what I'd pictured in my head. Thinking the project through tiny stage by tiny stage until I've made the whole project in my head at least 3 times before I start work helps me feel confident about having a go at things I've not attempted before. 

Incidentally, I am definitely blaming the Laura Ingalls books for this burst of making and doing. Bonnie and I have reached By The Shores Of Silver Lake now, and the culture of making what you need rather than buying it must be infiltrating my thought processes.

Right, I'd better get back to work on the Christmas Eve pjs. I wish you and yours a very merry CHristmas,
J xx

Monday, 18 November 2013

I meant it to look like that...

Hello webby pals!

Fancy some cake? Of course you do. All the better if it's home made. And people like me are always telling you how easy it is to knock up a batch of cookies, or a birthday cake, or some scones.  Just throw it together, it'll be fine.
Sometimes we lie.

Blackberry crumble cake
Well, not lie exactly. Once you've got a reliable set of weights and measures, a couple of standard sized tins, an oven that stays at the temperature the dial claims it is and a straightforward recipe, baking is a doddle. And of course you need the correct ingredients, and not to be interrupted at a crucial moment so you can remember whether you'd added the baking powder or not, and you hear the timer go off so you can actually remove it when it's done.

Sometimes life isn't quite like that. The baby needs a change, or you answer the phone and forget the timer or the toddler twiddles the oven dial, or you're stressed or you read the recipe wrong. Or it just all goes a bit wrong and you're not sure why.

It's OK. It's recoverable. Don't panic.

I was chatting to another school parent last week about this when she said she daren't bake because she'll only mess it up.There is generally something you can salvage from a cake gone wrong.  I thought you might like to hear a few of them, on the off chance you make a mess of things someone you know makes a mess of a cake and you can help them fix it. Because I have faith in you.

It Looks Messy - Relish it. That's home made, babe. You know the labels on fancy-pants artisan scarves or jewellery - 'Some variation in texture or colour is a natural part of this hand crafted item' - don't you? That's your get-out-of-jail-free card. We've all heard tales of school bake sale items that have been bought at the supermarket and bashed about at the edges a bit to make it look home made. Home baking is supposed to look a little irregular. You don't want it to look like that mass produced Mr Kipling rubbish, do you?

Burnt top - Easy to fix. Use a bread knife to gently cut off the burnt top. Turn the cake upside down and ice as originally planned. (A cut surface can pick up a lot of crumbs, and it can mess up the appearance of your icing.)

Burnt And A Bit Dried Out - Still not a disaster. Cut the burnt bit off as above. Then make a light sugar syrup - 100g sugar, 200ml water and simmer until the sugar has dissolved and the liquid has reduced by half. Take off the heat, flavour if necessary (with a splash of vanilla or some lemon zest, just to match the flavour of your cake). Using a pastry brush, lightly coat both the top and bottom of the cake. Leave 10 mins to soak in and then turn it cut side down and ice.
This has the added advantage of keeping a cake moist for longer, so is a neat trick if you have to bake your cake in advance of an occasion (like a birthday party)

Uneven - if your baking and icing techniques have abandoned you, I suggest taking the 'More is More' aesthetic and covering it with sweets. Pile enough sweets on and no one will spot the saggy bit or the unevenly trimmed side. I made a friend a cake utterly coated with Maltesers once because I didn't have time to do the fancy icing I'd planned. It looked so over the top and indulgent it was actually better than my original design. (you don't have to wrap it in a chocolate collar like the one in the picture)

Overcooked - if you left it in too long and it's rather stale-feeling, serve it warm with ice cream or custard. A 30 second blast in the microwave, loosely covered, will make it warm and moist feeling for a short while. Warm cake and ice cream is a winner. (This also works with stale cake. I use this with leftovers all the time)

Collapsed In The Middle - There are a couple of options. You could cut the middle out, pour a glaze over it and declare it a ring cake.  Then scoff the messy gooey middle bit yourself and deny all knowledge. Or you could use a cutter - a circular one used for making scones is a good one - and cut out little individual cakes. They actually look very chic when iced. A quick glaze of cocoa, icing sugar, hot water and a knob of butter melted in gives a good mirror finish in situations like that.

The Whole Thing Looks Terrible - have you any fruit purée? Apple sauce? A jar of posh jam? Layer the cake, jam and some custard or cream. Someone dropping a pavlova called it Eton Mess once upon a time and we all fell for it. You can call yours Yorkshire Jumble, or English Pud, or whatever. The trick is to say it with confidence. (Chocolate sponge with raspberry or cherry jam is lovely, by the way. As is vanilla with lemon curd or apple sauce)

Oh God It's A Disaster - anything even vaguely edible, no matter how dry or wonky or cut into uneven chunks it is, will perform the role of trifle sponge perfectly. Even if you don't have it now, stick your chunks of cake in a bag and freeze them until you do.

I Think It's Dead - dropped it, smushed it, generally destroyed it? My gift to you, my dear maladroit chum, is one word: truffles. Cake crumbs, a bit of melted chocolate, maybe a dash of brandy or rum, or perhaps a drop of cream. Mix them well, form into balls, pop on a tray and freeze for a few minutes (or even a month) to firm up, then drop them in  more melted chocolate and remove them with a fork. Look! You made lovely homemade chocolates! You are so good to your guests.

In summary, with a little flexible thinking you can make something tasty out of pretty much any cake that isn't actually charcoal. Assuming you want to.
On the other hand, if you went to the trouble of baking something for someone and they aren't delighted with your thoughtfulness and efforts, they know where they can go. Yep, straight to M&S to buy something.  And you can open a  bottle of wine box of chocs and say to hell with it all.

Jay x

Saturday, 19 October 2013

Presents From Nothing - except for a Yarndale purchase

Hello webby world!

I hope you're all well and happy today. I am struggling to feel upbeat in the face of grim, dark skies and a chilling fog. However, I do have a metaphorical ray of sunshine to brighten my morning - I've made a birthday present for Miss B out of stuff we were throwing away.

Yes, I am the zeitgeist-y-est woman imaginable today. Hand made stuff, upcycling, money saving etc etc. The only way I could be more On Trend (hideous phrase) would be if I was wearing a knitted moustache and humming What Does The Fox Say as I type.*

Miss B and I were tackling her overstuffed wardrobe the other weekend, pulling out the things that no longer fit and adding the latest hand me down batch that are the right size for her. Amongst the many items were heaps of T-shirts and long sleeved jersey tops that were a bit grubby, stained or faded. I didn't think they were the sort of thing anyone else would be particularly grateful for. The charity shops at the end of our road have big bins of slightly scruffy T-shirts and baby-grows at 25p each, so it wasn't likely they'd be too interested in the tops either.

I decided to have a go at something I've long fancied doing - making a rag rug.

At Yarndale I'd bought enormous knitting needles, some yarn made from old cotton sheets and a giant crochet hook. I knitted the yarn up into a blue and white bath mat - entirely unnecessary but splendid fun to do.Look at those great broom handles! Aren't they ridiculous?  I don't have a bathroom that has blue in it; the finished product clashes hopelessly. But I did enjoy doing it, despite them being a bit awkward to hold.
 
I thought I could cut up B's T-shirts into continuous strips and crochet them into an oval bedside rug for her room. She loves nice things for her room, so it could be part of her birthday present.

I won't lie to you, it was a labour of love.  The crocheting was fantastically quick and easy, but cutting the shirts up took about 10 hours across 3 days.  By the time I reached the end of the shirt stash my thumb was numb where the scissors pressed in and I had pins and needles in my hand. Mostly I did it in front of the TV of an evening. However, I did spend 2 hours chatting on a park bench with my friend Julie, her holding the T-shirt taut for me as I zipped along it with the scissors. We got some pretty funny looks, I admit.

 I got pretty good at it, almost no wastage at all except for the odd bits of trim or buttons. I cut in a spiral around the body of the T, then zigzagged back and forth to use up the sleeve fabric too. I got a good few metres from each shirt - not bad when you think they were a child's size 6.

As I went along I joined many of the strips together to make gigantic balls of jersey yarn. In retrospect that was a mistake, although their ridiculous oversized appearance did amuse me. I should have kept them separate so I could chose which colour to work in next as the rug progressed. The photo of the partially completed rug below shows the problem.  See that dark purple? It unbalances the rug, doesn't it. I didn't notice so much while I was working on it but once it was on the floor that dark strip really stood out as being out of place.


By that time I'd done another six rows of crochet and had thought the rug complete.  But no, that dark strip bothered me.  I put the rug away for a few days to look at it with fresh eyes.

Yep, still annoying.

So this week I unravelled it back past the purple and changed colours a bit.This was mostly to correct the colours but a tiny bit so I could play with the GIGANTIC crochet hook a little longer. My next project is going to take me weeks and be much harder, so I think I'm trying to extend my easy project a little. Like rearranging your sock drawer when an essay is due, only in gift-making terms.

I can't avoid the tricky project any longer so today I've promised myself I will complete the last couple of rows of the rug and move on.

I'm also baking up a storm today and need to clean the place up before one of my very best mates comes to stay, so finishing off the rug will probably be done in little snatches every time I sit down for a cuppa. I'll show you a picture as soon as it's done. So far I am delighted with it. I hope you'll like it too.

Happy Saturday!
J x

* After typing "What Does The Fox Say" I got the tune stuck in my head. so now I am humming it. Drat.

Monday, 9 September 2013

Making Something Useful

Hello webby mates!
Sorry for the 3 week gap. I've been on holiday for a fortnight with extended family, then spent this last week getting the remaining school stuff ready and doing all the unpacking and other post holiday chores. I thought I was looking forward to returning home to my garden and pets. However, with low temperatures, rain, one important pet death, 2 hens going broody, the rats peeing all over my favourite sweater and dress and my (formerly) favourite cat having diarrhoea in the laundry hamper I felt less than thrilled to be home.

On the bright side I have LOADS of chillies on the chilli pepper plants in the poly tunnel, the other hens are laying well, the apples, raspberries and plums are ripening and Joss Whedon has a new TV show starting this months. That's all worth being home for.

The most significant event this week - aside from the death of Slinky the skink - was my lovely 11 year old son starting high school.  He was so keen to make a good impression he got up super early to have a shower and get dressed in his shirt, jumper and blazer. He wanted everything to be just right. Unfortunately this translated to a certain pickiness when it came to a school bag, lunch bag and pencil case. We found the first two eventually but all the pencil cases he saw were girly or babyish. Come on, stationery suppliers, please stock less gendered stuff!

I thought I could make something myself that might do. I am trying VERY hard not to spend any money this month (beyond the essentials. I'm not making the kids fast or anything. Yet.) so I hoped to use things I already had.
I found a spare 10 inch zipper in my sewing box.  I'd bought it for a project last winter I ended up using buttons on instead. Then I had a good rummage in my fabric bins. I have two of those Tuff Crates you can get from Costco stacked next to my sewing machine desk. In theory everything I own for sewing would fit inside them. In practice they are bulging with fabric, batting, interfacing and so on, there's a huge stack on top of them in addition to 2 shelves full of books, thread spools and other haberdashery notions.  I LOVE an excuse to furtle about in the fabric bins. It gets me all inspired for projects. It's so hard to stay focussed when I'm there.
Anyway, I had several pairs of old jeans the kids had grown out of as well. Denim is a nice hard wearing fabric that would do a decent job as a pencil case. I chose one of Z's own pairs as I thought that would be more cool for him.

The lower part of the leg looked to me the most suitable. Well, easiest, anyway. I trimmed off the tatty hem and measured enough to make a roomy pencil case. This meant using the rather worn knee section of the jeans. I could either cut out a rectangle from the back of each jean leg or keep the nice side seam as part of the pencil case's look and reinforce it some way. I really liked the idea of the finished item looking as 'jeansy' as possible so I stuck to using that once leg. Plus, as a lazy wench I was happy to take the option that left me with one fewer seam to sew.

My next step was to cut the tube of denim open and trim off the unwanted second side seam. The legs tapered in so I also used my metre stick and my handy dandy rotary cutter to make it a more even rectangle.

To resolve the issue of the worn knees I remembered Z's Scout Camp badges. They kick about on bookshelves or in drawers being unloved clutter but too important to him to throw away. I stitched them across the worn bit and across a small stain.  Incidentally, I don't know why that photo is upside down. I've reformatted it several times but it just keeps flipping back.

  Next up, installing a zip. Here goes the "Do what I say not what I do" bit of the post.


Line up the wrong side edge of the zip with the right side of the fabric. Pin  and then tack into place. Tacking is the bit I forget. It holds the zip and jean edge more securely while I'm faffing about getting the presser and needle in the right position. As my zip is slip-sliding about I always think Drat! I meant to tack this in place.
Sew them together at a consistent gap from the teeth of the zip - you'll probably find the ridge the teeth make force your sewing machine foot a certain distance away.  As you get near to the zip itself - you know, the bit you pull to do it up - stop sewing.  Leave your needle in the fabric, lift your presser foot up and ease the zip past it to a part you've already sewn.  This bit is VERY IMPORTANT (and I forgot this too). If you try to sew past the zip pull its width will make your nice straight line in to a nice straight line with a blooming great swerve in it. Like, for example, the left hand side of the zip in the picture. 


As you see I went a bit wrong. I sewed a second line nice and evenly after that. It's on the inside of a pencil case; no one is going to see it. Except you guys, and I trust you not to point it out to my lad. 
Oh yeah, if you did the tacking that I forgot - dumb me - pull out the tacking stitches once you've finished. Their mission is complete. 

I did the same with the other side of the zip so I had a tube of denim with a zip running down its length. I then undid the zip about halfway so I'd have a nice easy way to turning it the right side out.

I drew a line across each open end of my pencil case from the end of the zip teeth down to the fold at the bottom. I am a firm believer in drawing lines to guide my sewing. I make a pig's ear of attempting straight lines without some guide to help keep me on track.

To prevent the denim fraying inside the case, I sewed a zigzag stitch right alongside my seam. I trimmed the excess denim as close to the zigzag as I could without actually cutting any of the stitches. I did a quick once-over checking for untrimmed threads then turned the finished pencil case the right way out.
There we go - a customised pencil case cobbled together in about half an hour from bits already in my house. My lovely 11 year old was delighted, I stuck to my promise of not spending any cash and I had a nice time doing it.